This period - that of Crusades - always fascinated me: I like both civilizations of that epoch that to be correct should be considered as 3 or 4 parts: the Franks (Europeans), the Byzantines, the Fatimid (Egypt) and the Turks Seljuds (Anatolia and Damascus).
In my continous researches of new scenarios - less known by the most - I stumbled into the campaigns that followed the siege of Jerusalmen (1099); these campaigns in fact allowed the new born Kingdom of Jerusalem to expand and to survive in a hostile surrounding environment.
It the very few months after the conquer of the Holy City, the Crusaders won a battle in Ascalon (south west) against the Fatimid Egyptians, assuring the southern borders.
Nonetheless, the Fatimids started a non-stop campaigning from South that lasted for the following 8 years, untill 1107. In this temporal frame, there is the Battle I want to reproduce with my papersoldiers: the 3rd Battle of Ramla in 1105. This battle is quite important because was the biggest (for numbers) of the 3 Ramla's battles and assured the existance of the Kingdom of Jerusalmen (once more) with a stunning victory of the Crusaders. It is also very interesting for the fact that it is the only one where Fatimids and Turks Seljuks fought together allowing me to deploy 2 different armies (so full of colour and fascination).
I started with my first map that represents the entire zone interested in the A.D. 1105.
 |
| Map nr. 1 - Kingdom of Jerusalem in 1105 |
In the map above, unlike most maps that represent the Kingdom of Jerusalem the southern border is aligned to the fortress of Ascalona, while after the Battle it went further south until to conquer Aila (today Aqaba) later on. Important to notice as well, that the Caliphate of Fatimids and the Turks Damascus were bordering (in nowaday Giordania). This is important because - as mentioned - in the 3rd Battle of Ramla also a Turkish force (around 1.300 horse archers) fought together with Fatimids. Surely, they did not pass through sea, because all the coast was occupied by the new Christian rulers.
This allows me to suppose that a caravan of fast moving Turks horsemen crossed the eastbank of Jordan river in order to gather with the Fatimids troops just arrived from Egypt by sea to Ascalona (numbers 1 in green (Fatimids) and black (Turks).
 |
| Map Nr. 2 - Muslim strategic movements in 1105 |
The Turks intervened because there has been a rift among the Turks ruling Damascus, because Irtash, brother of the prince Dukak (died in 1104) had fled in fear of the Atabeg Tughtigin, henceforth ruler of the city (1104 - 1128). Irtash went to Bosra and appealed to Baldwin I, King of Jerusalem for help/sustain. As a consequence of this Tughtigin sent aid to the Egyptiam forces already present in the fortress of Ascalona.
When King Baldwin I knew that the Muslim troops gathered around the fortress of Ascalona, understanding the intention of the Vizir of Cairo al-Afdal to proceed with new raids inside the territories of his Kingdom, he immediatly summoned his troops around Jerusalem and marched towards the town of Jaffa, where he camped, waiting the movements of the foes.
 |
| Map Nr. 3 - Crusaders' movements August 1105 |
In the morning of the 26th August 1105 the Muslim forces moved to the North in order to camp close to Ramla (at the epoch important town). Accordig to the Historia Hierosolymitana of Foucher de Chartres (the best cronicle - and unique - of the epoch) writes "qui nocte illa non plus longe a Ramula quam IV miliariis hospitati sunt" i.e. "They camped that night no more than 4 miles (i.e. 4.000 steps, around 3.000 m) from Ramla. According to another direct source they moved first towards Ibilin and then (probably) they turned right to get close to Ramla, in that moment under control of the Crusaders, but without walls.
 |
| Map Nr. 4 - March of Muslim troops to camp by Ramla on the night 26/27 August 1105 |
The Muslims' plan for the next morning was a double attack: the main part of the troops should have marched (undetected) towards Jaffa (letter B) to occupy it, while a second and minor part would have seized Ramla (letter C), that had no defensive walls. (in dark brown the roads); our mains source in fact writes: "qui cum rege mane contra se viderent cum suis procedere confestim ad proeliandum se paraverunt" i.e. "When they saw the King marching with his (troops) in the morning - towards Ramla obviously, even if not said - hastly they prepared for battle". He adds "however their scheme was somehow spoiled since they had planned to send a part of their army, although a lesser part, against Ramla so that it could deceive our army. However tehy had decided to send the greater part to Jaffa to attack and seize it unknown to us. But when they saw the King riding against them in this way at once gathered together their forces and their plan thwarted" . It is also stated that the Muslims left - for all those days - a fleet in fornt of Jaffa, in order to attack it by land and by sea. This means that the main target was not Ramla but Jaffa, and important and strategic port.
 |
Map Nr. 5 - Muslim attack plan
|
It is interesting to note that the fact that the Muslim had to gather their troops to face the Crusaders means that - unlike Foucher of Chartres reports as strenght of the Muslim forces as 15.000 men - the real number of Muslim troops was arond 6.300 men; if not, it would have no sense for the Muslim to put together 15.000 men to face around 3.000 (and to lose a battle);
At the contrary, they needed to have a prevailing number of forces, possible only putting together both forces, with logical consequence that the Muslim Army was around 6.300 men. This is also confirmed by the fact that - except 1.300 Turks on horse - the rest had been transferred by ship to Ascalona. To transfer 14.000 men would have requested a huge number of ships, and a military and logistic effort not affordable and possible for the Fatimids. The Historia then says that the Muslim fleet was later on partially destroyed, capturing 25 ships (meaning that the total number of the fleet could have been some multiple of 25 ships, i.e. 75 for example), that had (William of Tyre) 2.000 sailors and rowers (160 men per ship); it is supposed that every ship could tranport 100 warriors and so it means that to transport 15.000 men it would have requested 150 ships while just 25 were captured even though they represent a huge part of the entire fleet, that had to be much smaller.
In the map above it is important to note that the Turks (in black colour) are deployed on the right of the Muslim array, as it is described in the battle. The fact that this troops were on the right means that they were originally been used for attacking Ramla and not Jaffa, as shown in the map nr. 5 (the little black dots).
Also the array of the troops is correct, while it must be considered that some of the Fatimid cavalry on the left, turned towards Jaffa (north) heading towarrd the Christian camp.
Now, once described the strategical and tactical phases, it is time to examinate the real unfolding of the Third Battle of Ramla. There is on Internet just one picture of the deployment, from an (erased) site, that had a lot of mistakes. It is important to notice that the Muslim troops had the (Crusade) town of Ramla at their back and where marching towards Jaffa, as the Crusaders were marching from Jaffa to encounter the Muslim on the road that linked the two towns.
 |
Map Nr. 7 -The battlefield of the Third Battle of Ramla
27th August 1105 |
One of the most difficult element to understand is the real number of fighting troops at the battle and how they were arrayed and deployed.
MUSLIM FORCES:
Fulcher de Chartres writes "pagani autem XV milia tam de peditibus quan de militibus deputabantur" i.e. "the pagans were believed to be 15.000 men foot and horse. Here we have the first element to point out; Fulcher was not present at the battle as he wrote he remained in Jerusalem to pray. This means that he reported numbers from people that participated to that battle. At the epoch was common to increase the number of enemies in order to give prestige to the victory (or justification to a defeat). Moreover, it is difficult for someone that has to judge the adversary forces to give numbers, while it is trustable for his own forces because he got the report from the commander, as in this case.
So to have an idea of the real force of the Muslim army we have to turn our attention to the Muslim sources to the famous Muslim historian Ibn-al Athir that wrote that the forces of the "Egyptian" army were 5.000 men; to these, must be added a further 1.300 Turks horse bowmen (Ibn al-Athir was strongly against the Fatimids dynasty ans so can have put just the Egyptian troops, avoiding to mention the Turks troops, present at the battle).
This gives a total amount of 6.300 men, whose 5.000 Egyptian and 1.300 Turks (horsemen with bows); of the Egyptian troops around 3.000 where infantry (Sudanese/Ethiop) troop (with spear and shields in the first rows and bows behind. The Fatimids armies has in fact a huge pecentage of infantry. So, summarizing these are the numbers:
1) 1.295 Turks horsemen with bows
2) 1.845 Egyptian horsemen (1.725 heavy; 120 light)
3) 3.160 Infantry: Sudanese (Ethiop) Infantry: 2.040 front row; 1.152 bowmen (Armenians?) and javelins
The deployement
- Right wing:
1.300 Turks cavalry + 320 Heavy Fatimid Cavalry
- Center: 3.192 infantry on 2 formations: heavy infantry 2.040 (Sudanese/Ethiopic); bowmen (Armenians?) on the rear 1.152 men and a little Egyptian Cavalry formation at the back (160 Heavy horsemen)
- Left Wing - 1.245 Fatimid Horsemen (1.125 heavy & 120 light)
We can suppose that infantry fought on different rows, because they resisted the multiple charges of Crusades. In the late Fatimids Army the infatry was arrayed by nationality and the heavy armoured infantry in the front to resist cavalry attacks. In defence they would make a shield-wall and use their spikes and spears and javelins while Armenian archers, supported them, making a rain of arrows to diminish the impact of cavalry. (In attack they would either advance en masse or send forwar selected sectrions of line, cavalry covering the flanks.
We can suppose then that the 1st heavy armoured infantry was split in 6 (horizontal) formations of 5 men thick (340 men) - with last row of javelins throwers, eventually, but not sure; and 68 men width; behind 3 rows Armenian (possibly or Ethiop) archers formation (6 in total again) of 192 men (64 men per row).
It is important to note that - unile Men at Arms nr. 171 "Saladin and the Saracens" says or at least does not clarifies, the black warriors (called abid el-shira) where not good archers, but good javelins - throwers, while Armenian troops were execellent archers and widely used in the Fatimid Army. So it can be (even though there is no clear evidence in the original text, that the archers behind the Ethiopian/Sudanese troops were Armenians.
 |
Map nr. 8 - Fatimid (Central) Infantry Array
|
The Seljuqs (Syrian) Cavalry (1300 horsemen); they could shoot on the move, but normally they shot while their horse stand still (more effective), drown up in "disciplined ranks"; we can suppose - to have an effective range - that these ranks were 3.
We can suppose 8 Turks (Damascus Seljuqs/Guhlam) formations of 162 men circa, 55/56 men per row.
 |
| Map nr. 9 - Damascus Right Cavalry Wing at the 3rd Battle of Ramla |
The Fatimid (Egyptian) Cavalry was as mixed as infantry and fought split by nationalities. In the late period (this one already) the percentage of Berber units diminished a lot, and increased the number of freeborn descendants of earlier ghulams. This can be considered as heavy cavalry. They had heavy armour, mail hauberks, quilted of fabric-covered mail jubbahs.
We can consider the Fatimid cavalry fighting as the Seluqs troops. They were (in total) 1.780 (rearguard included), again split into 13 formations of 160 - 162 men each circa; of these
- 1 was in the rearguard of the infantry and to protect the command
- 2 were sent in support of the right wing (Damascus troops) (from the left wing)
- 10 were the remaining forces on the left cavalry wing.
The remaining 120 light Cavalry(Arabs) they were used mostly as scouting and less effective agaist heavy armoured Crusaders' cavalry, in 6 groups of 25 men (2 rows of 12 men), they remained on the left and probably are the troops that fled the battlefield.
CRUSADERS' FORCES: In this case. Fulcher de Chartres is a good help: in his position he probably perfectly knew the real numbers of the Crusaders; he writes: "milites nostri erant simul quingenti, exceptis illis, qui militari nomine non censebantur, tamen equitantes. Pedites vero nostri non amplius quam II milia aestimabantur". (our knights were all together 500, with exceptions of those that were not considered in the knight status - militari nomine - , but nonetheless they were on horse). This text allows to understand what usually is not pointed out (see the articles on Wikipedia for the battle); usually it is reported that the Christian forces were 500 knights and 2000 infantry.
From the text of Fulcher indeed is possible to distiguish 3 different categories:
- knights ("militi")
- sergeants (and maybe squires) on horse (equitantes)
- infantry (pedites).
The Milites (of Christ) were the Knight, i.e. the nobility of the Army, and they were considered as main force and representative of the military status. Every Knight had at least 1 sergeant and 1 squires. It is known that (later) to the Templar Knights were allowed to have just one squire each. It is also known that the Patriarch of Jerusalm led with him around 150 men in support, both on horses and foot. The ones on horses could be considered as "sergeants" and in a number of 50. The rest (100) on foot.
To make it short, we can consider: 500 knights, 50 sergents (with the Patriarch= plus around another 370 sergeants with the King's force and around 110 fighting squires (not always they were all fighting) with a total force (on horse) of 1.030 horsemen, according also to the text of Fulcher. In is also possible to avoind to insert the squires into the fighting units. Hence the number would be 500 knights and 530 sergeants; in this way also the forces are well balanced between kinghts and sergeants.
This number allows us to understand also how it was possible for the Christian Army to withstand and attack the Muslim Army; it would be in fact rather impossible to do that with a force of just 500 horsemen, charging continously against the infantry in the center.
Infantry: 2.000.
1) 500 Knights
2) 420 sergeants (on horses)
3) 110 fighting squires on horse
4) 2.000 infantry.
second versione (preferable) without fighting squires
1) 500 Knights
2) 530 sergeants (on horses)
3) 2.000 infantry (1330 infantrymen and 670 bowmen).
What is important to note is the way the Cavalry was fighting. During the Crusades they used small units; a big unit was called "bataille" but the tactical unit was the "conrois", drawn up in ore or more very closely packed ranks (3 or 4 max) with heavy knights on the front, lighter sergeants behind and squires in the rear (probably not fighting but just as support to the knights). The identity of a conrois was indicated by a sort of pre-araldic patterns on shields. Each conrois consisted of around 20/25 men divided in smaller echelles (squadrons) or compagnies.
So 1 bataille will be 1 cm wide on the map here under, representing around 40 meters, i.e 3 conrois of 25 men each (total 70/75 horsemen) in 2 ranks, so 32/35 men per line (not 3 because the front would have been too short to face the large amount of Sudanese infantry); or possibly on 3 ranks (front of 25 horses) as a maximum depth of the convois, keeping between them wider spaces to face the large array of Sudanese infantry and to keep in any way a thick mass of horses charging and pushing.
The infantry will be arrayed in units of 4 rows, of 50 men each row (so 200 men in total) for the same width (1 cm on the map and 40 meters in reality); 10 of these. It is also important to note the rate of archers in the Crusaders' Army. It is known that the ratio was quite high and hence we can suppose 1/3 of the Infantry carried bows, so around 670 bowmen.
The Bataille present at the battle (10) were possibly so divided into:
2 batailles as main body of the King
1 bataille under Hugo de Tabaria (Tiberias), Baron, (Hugo de Saint Omer) - Principate of Galilea
1 bataille under Rorgius de Chayphas (Haifa) - Principate of Galilea
1 bataille under Gunfridus de Turri David (around Jerusalem)
1 bataille under Hugo de Hebron, Principity of Galilea
1 bataille under Eustach Graner, Lord of Cesarea
1 bataille under Guttmannus de Brussella, castello Brabantiae
1 bataille under Pisellus de Tuorna
1 bataille under Balduwinus de Hastrut, castello Flandriae (Flemish)
 |
Map nr. 10 - Christian Cavalry formation at the 3rd Battle of Ramla
|
THE CRUSADERS' STANDARDS OF THE "BATAILLE"
I added (2024) this part of teh post to increase the knowledge and completeness of this battle. I was wondering about the standards that the single cavalry "bataille" were carrying at the Third Battle of Ramla. A not easy task.
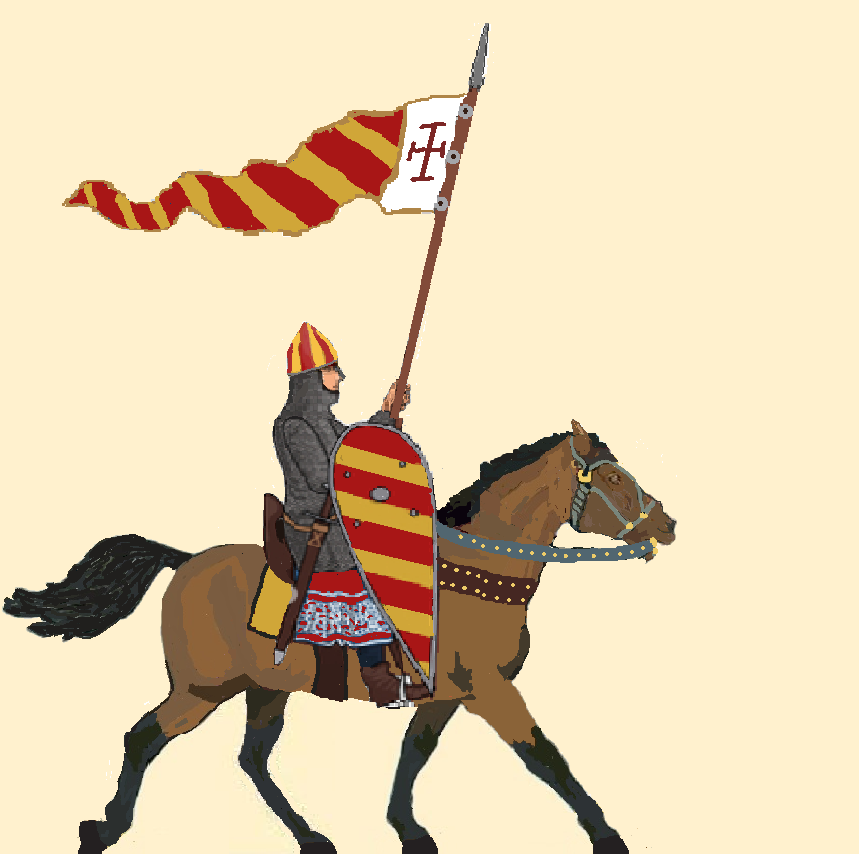
The Flag of the Kingdom of Jerusalem is well know and was close to the King and does not represent a problem (2 Batailles):
 |
| Standard of the Kingdom of Jerusalem 1105 |
More difficult the rest i.e. to identify the names and titles of the single princes commandig single "batailles"
.
BATAILLE DE HUGO DE TABARIA
Sometimes the Title of Prince of Galilea was switched to Prince of Tiberiad (Tabaria), hence the confusion. More precisely Hugo was Prince of Galilea and Baron of Tiberiad.
In any way this Falimy was ruling the Pricipate of Galilea (Tiberiad).
1 bataille under Hugo de Tabaria (Tiberias), that originnaly was Baron, i.e. Baron Hugo de Saint Omer; luckly, I found this image that represents him (Prince of Galilea and Baron of Tiberiad) in the moment when he was killed in 1105 during a raid (so just after the Third Battle of Ramla).
From this miniature I did the following standard bearer of the Pricipauté of Galilea (and Barony of Tiberiad)
%202024.png) |
| Principate of Galilea 1105 |
BATAILLE DE RORGIUS I DE CHAYPHAS (HAIFA)
It was not easy to trace back this family. After some reasearches I found out that this was a son of Geldemar Carpenel, first Lord of Chayphas. (in fact the descendands and rulers of this fief were all belonging to this family.
I found a very interesting map, with the coats of arms of all territories/families exactly in 1105. It is easy to see the coat of arms of the Carpenel Family.
This is the standard bearer
 |
| Lordship of Chaypha (Haifa) |
BATAILLE DE GUNFRIEDUS DE TURRIS DAVID
This was the usual appellative given to the Chatelain of Jerusalem aka of the Tower of David.
His family's name was de Cavis
GUNTFRIED de CAVIS His name suggests Germanic origin. Châtelain of the Tower of David:
"...Peselus vicecomes, Gaufridus de Turre David..." subscribed the charter dated 1104 under which Baudouin I King of Jerusalem donated property to the Genoese church of San Lorenzo. Albert of Aix names "Hugo de Tabaria, Rorgius de Cayphas, Guntfridus de Turri David, Hugo de Sancto Abraham, Eustachius Granarius, Gutmannus de Brussella castello Brabantiæ, Lithardus de Cameraco civitate Galliæ, Pisellus de Tuorna, Baldewinus de Hastrut castellis Flandrie" as those who went to relieve King Baudouin at Jaffa, dated to [1105/06] from the context. Albert of Aix records "Gunfrido custode ac præposito turris David" (named“Gunfridus custos ac præpositus arcis et turris Iherusalem” in a later passage) supporting King Baudouin “incivitate Ramnes”, dated to [1107]. A charter dated 1112 records that Patriarch Arnulf donated property to the church of Josaphat, including “decimam Gumfredi de Cavis scilicet de casalibus Mezera et Daltim” (another version "casalium Caveæ et Tarphim) quae fuerunt Gumfredi de Turri
It is possible to make a standard similar to that of the Kingdom of Jerusalem, with little modifications:
 |
| Standard of the Chatelain Turris David |
THE MARKS
To represent on the map the troops, I considred that a infantrymen occupied a space 80 cm wide, while a cavalryman 130 cm wide.
The Crusaders have the same width because both infantry and cavalry have the same front (40 m) even though with different numbers.
The Fatimid had heavy cavalry (Damascus and Egyptian) formation 54 men wide i.e. 64 men and 1.6 cm; again the mark will be 1,6 cm
Sudanese heavy Infantry 54 meters i.e.1,35 cm;
Sudanese/Armenian Infantry - Archers 1,2 cm
Fatimid Arab light 30 meters wide. 0,8 cm. (2 formations regrouping 3 little units each)
THE BATTLE
To describe the battle I used a map done by me where I moved the marks on.
 |
| Map nr. 11 - The Battlefield of Ramla with directions of the closest towns |
The battlefield did not have any shelter or natural protection, being flat and mostly sandy.
 |
| Map nr 12 - Approaching Christian movements |
In the morning of 27th August 1105 the Royal troops of the King Baldowinus I, gathered in Jaffa moved from that town towards Ramal to encounter the Muslim troops. There is no details on the deployement of the Christian forces while movieng, but it is well known that the technique - as here represented - consisted in two coloumns of infantry, protecting the central Cavalry, and forming a sort of box inside which the precious cavalry had shelter. In front a unit explorers on horses to check the road.
 |
| Map nr. 13 - Preparing for battle |
There is no precise description of this movement in the chronicles of the epoch, there is one point that allows to understand how the two armies in reality deployed before battle; it will be explained later on. In any case the Crusaders turned right in order to face the enemy that was arriving from Ascalon.
 |
Map nr. 14 - Legenda of troops
In the map nr. 14 a legenda of the troops that partecipated to the battle. For what is concerning the Fatimif deployement, they had a central strong position with the Sudanese heavy armoured infantry, sustained from behind by the archers (Sudanese or Armenian or both); on the wings: right the Seljuqs Horse archers, helped by some units of the Fatimid heavy cavalry; on the left wing Fatimid HEavy cavalry, with some light Arab cavalry (scouting); both wings were deployed a little behind the infantry (hidden?) to attcact the Crusaders to charge frontally (see following map).
|
 |
Map nr. 15 - Christian Cavalry movements
The Crusaders' cavalry - when well cooperating with infantry, like in this battle - used the infantry as a shield, to pass through to attack; the the map nr. 15 are shown the movements of cavalry to start to charge, passing through infantry, that opened the ranks to let them pass.
 | | Map nr. 16 - Christian Cavalry charge |
|
In the map nr. 16 is shown the Christian charge on the center of the Muslim array.
TO BE CONTINUED ON POST DATING 27 NOVEMBER 2023


%202024.png)


.png)
.png)
.png)

.png)


